
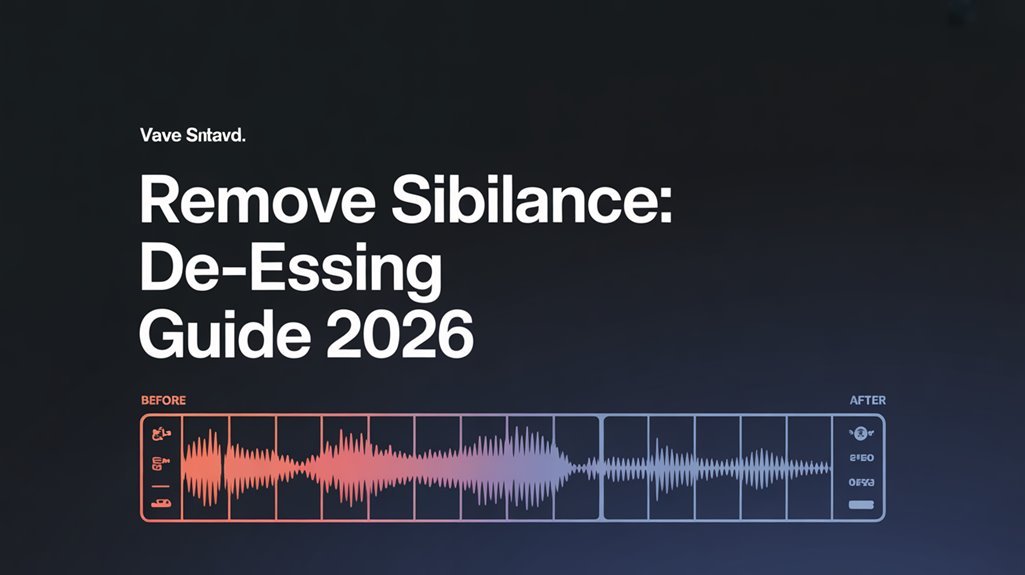


To effectively remove sibilance from your audio, mastering de-essing is key for achieving clarity. Start by identifying harsh “s” and “sh” sounds in your recordings. Utilize de-esser plugins or dynamic EQs to target specific frequencies, while also considering manual techniques like adjusting mic placement. Make certain you also use EQ to tame harsh peaks. Stick around to explore tools, techniques, and best practices that’ll help you perfect your sound and eliminate unwanted sibilance.
Table of Contents
Key Takeaways
- Identify sibilance by listening for harsh “s,” “sh,” and “z” sounds in vocals, and use headphones for better detection.
- Utilize hardware or software de-essers to effectively reduce sibilance during mixing, selecting tools based on specific needs.
- Apply gentle compression to maintain a natural sound while controlling dynamic peaks associated with sibilant sounds.
- Adjust microphone positioning and use pop filters during recording to minimize sibilance right from the source.
- Monitor mixes on various playback systems to ensure consistent sound quality and catch any remaining sibilance issues.
Understanding Sibilance: What It Is and Why It Matters
Sibilance is that sharp, hissing sound you often hear in speech and singing, created by the letters “s,” “sh,” and “z.” It can enhance the clarity and expressiveness of vocals, but too much of it can be distracting and unpleasant.
Understanding the sibilance definition is essential for anyone working with audio, as it affects how listeners perceive your recordings. The sibilance effects can range from adding brightness and detail to vocals, making them stand out, to creating an irritating experience if overemphasized.
You might find that managing sibilance is key to achieving a polished sound. By recognizing its impact, you can balance clarity and comfort, ensuring your audience enjoys your recordings without being overwhelmed by harsh, hissing sounds. Additionally, effective website navigation can help you find the right tools to manage sibilance in your audio projects.
Identifying Sibilance in Your Recordings
Recognizing sibilance in your recordings is essential for achieving a professional sound. Sibilance detection involves listening closely for those harsh “s,” “sh,” and “t” sounds that can pierce through the mix.
Start by playing back your tracks at a moderate volume, focusing on vocal performances. During your recording analysis, pay attention to any moments where the vocals become overly sharp or distracting. If you’re using headphones, this can help you pinpoint problem areas more effectively.
You might also consider inviting a fresh pair of ears to listen, as they may catch sibilance you missed. By honing your skills in identifying sibilance, you’ll be better prepared to tackle it in post-production. Additionally, utilizing analytics solutions can provide insights into frequency distribution, helping you identify problematic sibilance more efficiently.
Tools for De-Essing: Software and Hardware Options
When it comes to de-essing, you’ve got a variety of tools at your disposal, both software and hardware.
For hardware de-essers, options like the DBX 902 and Waves’ CLA-2A are popular choices, praised in user reviews for their effectiveness.
If you’re leaning toward software solutions, check out plugin recommendations like FabFilter Pro-DS and iZotope Ozone, which offer budget options and advanced techniques for precise control.
These plugins easily integrate into your workflow, streamlining your sound design process.
Remember, the right tool depends on your specific needs and budget.
Page Not Found errors can often be a result of broken links, so experiment with different options and find what works best for you, ensuring you achieve a polished, sibilance-free sound in your recordings.
Manual Techniques for Reducing Sibilance
Although digital tools offer great convenience, manual techniques for reducing sibilance can be just as effective, especially when you want a more hands-on approach. Here are some practical approaches to take into account:
- Mic positioning: Adjust the distance and angle to minimize sibilant sounds.
- Plosive control: Use a pop filter to reduce harsh “s” sounds during recording.
- Vocal performance: Encourage the vocalist to soften their articulation on sibilant sounds.
- Volume automation: Manually lower the volume of specific sibilant peaks in your audio editing software.
- De-essing with EQ: While we won’t dive deep here, a slight EQ adjustment can help manage sibilance effectively. Additionally, understanding key differences between tools can empower you to select the most suitable software for your audio editing needs.
Using EQ to Tame Harsh Frequencies
Manual techniques can certainly help, but using EQ is one of the most effective ways to tame harsh frequencies, including sibilance.
Start by employing EQ techniques to target specific frequency ranges that contribute to sibilance. Use spectrum analysis to identify these troublesome frequencies and adjust your filter settings accordingly.
By applying resonance control, you can reduce unwanted peaks while maintaining tonal balance. This can enhance audio clarity without sacrificing the overall sound.
Be mindful of frequency masking; when you cut harsh frequencies, make sure it doesn’t negatively impact other elements in your mix.
Ultimately, fine-tuning your frequency response with EQ not only improves your vocal tracks but also creates a more polished and professional sound. Additionally, streamlining workflows can significantly enhance your audio production process.
Compression Strategies for Sibilance Control
When you’re tackling sibilance, using compression strategies can make a big difference. You’ll want to explore dynamic range adjustment techniques and sidechain compression methods to keep those harsh sounds in check. Let’s break down how these approaches can enhance your mix and guarantee clarity in your vocals. Additionally, understanding project management software can greatly aid in organizing your audio editing workflow and achieving optimal results.
Dynamic Range Adjustment Techniques
To effectively manage sibilance in your audio mixes, employing dynamic range adjustment techniques is crucial. By using compression strategies, you can control the audio dynamics and reduce harsh sibilant sounds.
Here are some tips to enhance your dynamic range management:
- Use a de-esser: Target specific frequency ranges where sibilance occurs.
- Apply gentle compression: Maintain a natural sound while reducing peaks.
- Adjust attack and release times: Tailor them to the tempo of your track for a smoother effect.
- Monitor levels consistently: Verify your dynamic range remains balanced.
- Experiment with parallel compression: Blend processed and unprocessed signals for a richer sound.
With these techniques, you’ll markedly improve your mixes and achieve a more professional finish.
Sidechain Compression Methods
Sidechain compression offers an effective way to manage sibilance while enhancing the overall clarity of your mixes. You can use sidechain techniques to trigger compression on a vocal track whenever sibilant sounds occur.
Start by setting the compressor’s sidechain input to the sibilant frequency range, allowing it to respond specifically to those sharp sounds. Adjust the compression ratios to achieve a natural sound—too aggressive can lead to unnatural artifacts. A ratio of around 3:1 to 5:1 often works well for de-essing.
Additionally, fine-tune the attack and release settings to guarantee the compressor reacts smoothly without cutting off the vocal’s essence. With these methods, you’ll effectively reduce sibilance without sacrificing vocal quality.
The Role of De-Esser Plugins in Audio Editing
When you’re editing audio, selecting the right de-esser plugin is essential for managing sibilance.
You’ll want to take into account the different types available and the key features that can elevate your sound.
Understanding these elements helps guarantee your vocals remain clear and polished without harshness.
Types of De-Esser Plugins
De-esser plugins come in various types, each designed to tackle sibilance issues in unique ways.
Choosing the right one can greatly enhance your audio editing process. Here are some popular types:
- Standard De-Essers: Basic tools for general sibilance reduction.
- Multiband De-Essers: Allow frequency specific control, targeting specific sibilant frequencies without affecting the entire signal.
- Dynamic EQs: Combine equalization and de-essing, offering precise control over problematic frequencies.
- Linear Phase De-Essers: Preserve phase relationships for transparent sound.
- Multi-Effect Plugins: Integrate de-essing with other processing tools for a thorough solution.
Key Features to Consider
Several key features can make or break your experience with a de-esser plugin in audio editing. When selecting a plugin, consider its frequency range, attack and release settings, and visual feedback options. These elements greatly impact your de-essing techniques and enhance vocal clarity.
| Feature | Importance |
|---|---|
| Frequency Range | Targets specific sibilance |
| Attack/Release | Controls smoothness of removal |
| Visual Feedback | Helps monitor adjustments |
With the right combination, you’ll effectively reduce harsh sibilance without sacrificing the natural quality of the vocals. Investing time in understanding these features can elevate your audio projects, ensuring your final mix sounds polished and professional.
Best Practices for Recording to Minimize Sibilance
To effectively minimize sibilance while recording, you should pay close attention to microphone placement and choice. A well-planned recording environment helps reduce unwanted harshness in your vocals.
Here are some best practices to follow:
- Choose a quality microphone suited for your voice.
- Use pop filters to soften plosive sounds.
- Experiment with mic placement to find the sweet spot.
- Incorporate acoustic treatment to control reflections.
- Warm up your voice and practice vocal techniques beforehand.
Additionally, plan your sessions carefully to guarantee ideal conditions.
Mixing Tips for Maintaining Clarity Without Sibilance
When mixing, you need to be mindful of the frequency ranges that can cause sibilance.
Balancing your dynamic range also plays an essential role in achieving clarity without harshness.
Frequency Range Awareness
Even if your vocals shine with emotion, harsh sibilance can quickly detract from the overall clarity of your mix. To combat this, it’s essential to understand the frequency response of your vocal tracks.
By focusing on the specific frequency ranges where sibilance perception peaks, you can make smarter mixing decisions. Here are some tips to enhance your awareness:
- Identify the sibilant frequencies (typically between 5kHz and 8kHz).
- Use EQ to gently reduce these frequencies without losing vocal presence.
- Apply a de-esser to target sibilance directly.
- Monitor your mix on different systems to catch any lingering sibilance.
- Trust your ears; if it sounds harsh, it likely is.
Dynamic Range Management
Effective dynamic range management is essential for maintaining vocal clarity while minimizing sibilance. To achieve this, you can utilize dynamic range expansion techniques to enhance the quieter parts of your mix, allowing vocals to breathe without overwhelming listeners.
Conversely, apply dynamic range compression to keep louder sibilant sounds in check, ensuring they don’t pierce through the mix.
When mixing, adjust your compressor’s attack and release settings to target sibilance effectively, giving you greater control over those harsh frequencies.
Additionally, consider using a de-esser to further tame any remaining sibilance without sacrificing clarity. Balancing these techniques will create a polished sound, allowing your vocals to shine while avoiding the pitfalls of excessive sibilance.
Finalizing Your Audio: Quality Checks and Mastering Techniques
As you approach the final stages of your audio project, it’s crucial to perform thorough quality checks and apply effective mastering techniques.
These steps will guarantee your audio quality shines and that listeners have the best experience possible. Here are some key points to focus on during this process:
- Check for any remaining sibilance or unwanted frequencies
- Verify consistent volume levels throughout the track
- Listen on various playback systems (headphones, speakers, etc.)
- Adjust dynamics and EQ for a polished sound
- Pay attention to the overall balance and clarity
Frequently Asked Questions
What Causes Sibilance in Different Vocal Types?
Sibilance often arises from vocal techniques, like excessive breathiness or harsh consonants. Poor microphone placement can exaggerate these sounds. Adjusting your technique and positioning can help minimize unwanted sibilance during recordings or performances.
Can Sibilance Be Completely Eliminated From Recordings?
Sibilance can’t be completely conquered, but you can greatly reduce it using sibilance control techniques. The recording environment impacts the outcome, so make sure you optimize acoustics for smoother sound and better vocal clarity.
Is Sibilance More Prominent in Certain Microphones?
Yes, sibilance can be more prominent in certain microphones due to their design and frequency response. Microphones with a boosted high-end often accentuate sibilant sounds, making them more noticeable in recordings. Choose wisely for your needs.
How Does Sibilance Affect Listener Perception of Audio Quality?
Sibilance can negatively impact listener experience by making audio sound harsh or piercing. When you minimize sibilance, you improve audio clarity, allowing listeners to engage more fully with the content and enjoy a better overall experience.
Are There Specific Genres More Prone to Sibilance Issues?
In the world of music, pop and rap often lead the pack when it comes to sibilance issues. Vocal techniques and recording environments can amplify these problems, making careful attention essential for a polished sound.
Conclusion
In the world of audio, sibilance can sneak in and ruin your recordings, but you now have the tools to tackle it head-on. Did you know that over 70% of listeners find excessive sibilance distracting? By applying the techniques we’ve discussed, you can create clean, professional-sounding audio that keeps your audience engaged. Whether you’re recording or mixing, remember that a little attention to detail can make a world of difference in your final product.


