
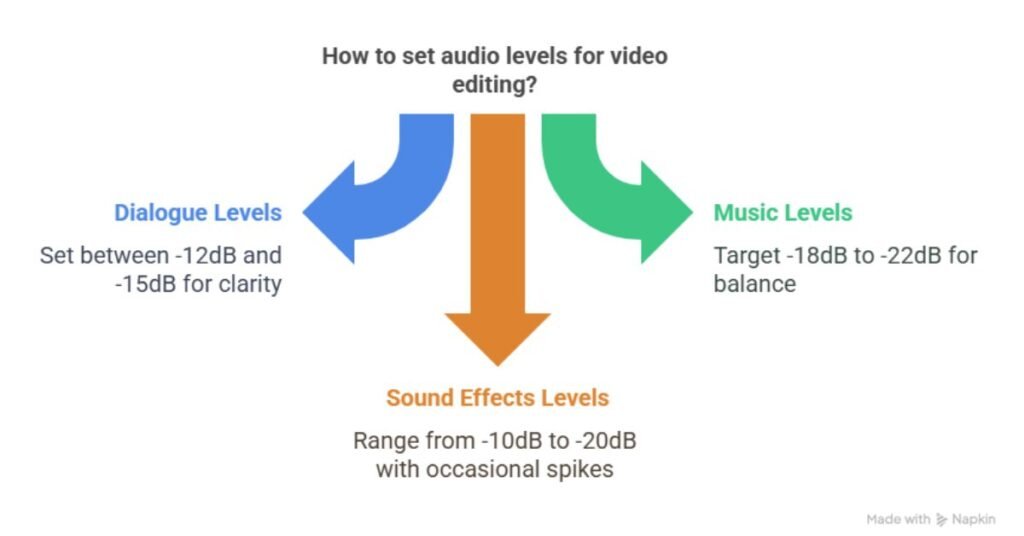


First, always monitor audio levels on editing software’s meters to keep peaks below -6dB, preventing distortion. Aim for an overall mix between -10dB and -20dB, with dialogue around -12dB to -15dB for clarity. Use tools like gain controls to adjust in real-time, ensuring nothing hits 0dB or clips.
For music, target -18dB to -22dB, and sound effects between -10dB and -20dB, with occasional spikes to -8 dB. Test levels by playing back on various devices and fine-tuning for balance. Remember, these guidelines adapt to your video’s style—whether vlogs or films—so experiment actively to achieve professional results without overwhelming the sound.
Table of Contents
Understanding the Importance of Audio Levels
I see how audio levels directly impact viewer engagement, as poor sound can make lose interest in a video faster than bad visuals. I’ve noticed the YouTube Loudness War, where creators pushed volumes to extremes, often leading to distorted audio that frustrates audiences. That’s why I’m focusing on these aspects to help you set levels that keep viewers hooked and avoid common pitfalls.
Impact on Viewer Engagement
While audiences often overlook visual imperfections, poor audio levels can swiftly erode viewer engagement by introducing distortion and inconsistency that disrupt the narrative. I see this firsthand in my videos; if audio quality suffers, viewers tune out quickly, missing the story’s essence. That’s why I prioritize crisp, balanced sound—it’s not just about avoiding distortion but creating an immersive experience that holds attention. For example, when I keep dialogue clear and levels consistent, I notice higher watch times and comments. Poor audio quality makes me lose viewers to frustration, so I actively test and adjust, ensuring every element enhances flow. Ultimately, I believe strong audio quality turns passive watchers into loyal fans, fostering deeper connections and shares. It’s a simple step that transforms engagement.
Overview of the YouTube Loudness War
The YouTube Loudness War stems from creators cranking up audio levels to grab attention, often at the expense of quality. I’ve seen how this trend pushes audio loudness beyond safe limits, causing distortion and listener fatigue. As a content creator myself, I know that aiming for higher decibels might make videos pop in feeds, but it backfires by overwhelming audiences and violating platform guidelines. This war highlights why I always prioritize balanced audio loudness—keeping peaks under -6dB guarantees clarity without clipping. By understanding this, you’re better equipped to set levels that engage viewers without competing in the volume arms race. Remember, I focus on quality over quantity to keep my videos professional and enjoyable. This approach not only boosts retention but also fosters a loyal audience who appreciates crisp sound.
Basics of Audio Terminology
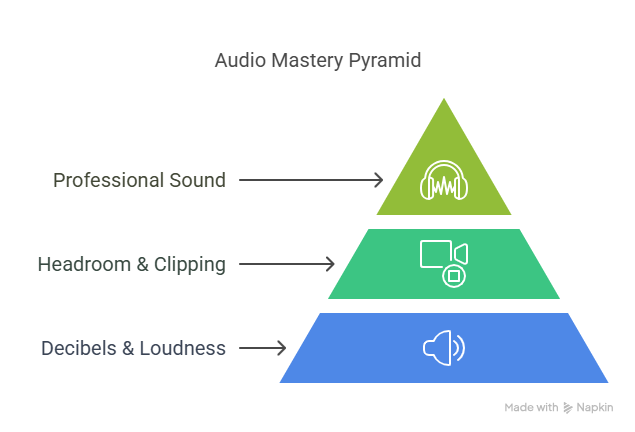
I want to start by explaining the basics of audio terminology, focusing on decibels and loudness, which measure sound intensity and help me set proper levels in my videos. Next, I’ll cover headroom and clipping, as I guarantee there’s enough space below the maximum level to avoid distorting audio during recording or editing. Understanding these concepts lets me maintain clear, professional sound in every project.
Decibels and Loudness
Decibels measure sound intensity and loudness, forming the foundation of audio work. I rely on decibels daily to balance my videos, ensuring they evoke the right emotions without overwhelming viewers. Decibels quantify how sounds affect us—soft whispers can soothe, while sharp spikes might startle or annoy. It’s fascinating how I adjust levels to match the story’s mood, making dialogue feel intimate or music energizing.
To connect you emotionally, here’s a table of decibel levels and their impacts:
| Decibel Level | Emotional Effect |
|---|---|
| 30 dB | Soothing, like a whisper |
| 60 dB | Comforting, normal chat |
| 80 dB | Agitating, traffic noise |
| 100 dB | Alarming, concert blast |
| 120 dB | Painful, potential harm |
I always check decibels first to create videos that truly resonate.
Headroom and Clipping
Headroom gives audio the buffer it needs to avoid clipping during recording. I always guarantee there’s enough headroom in my projects to prevent distortion when levels spike unexpectedly. For instance, I aim for peaks around -6dB, leaving space below 0dB so I can adjust without clipping ruining the sound. Clipping happens when the signal overloads, flattening waveforms and creating harsh noise that I hate hearing in final mixes. By monitoring headroom closely, I protect my audio’s integrity, making edits smoother and more professional. Remember, I check levels on various devices to confirm headroom works across platforms, keeping your video’s sound clear and engaging without any unwanted surprises.
Setting Audio Levels during Production
When I’m setting audio levels during production, I start with ideal mic placement to capture clear sound without distortion. I make sure to use backup microphones so I can avoid potential failures and keep my recordings reliable. This approach helps me maintain consistent levels right from the start.
Optimal Mic Placement
In my experience, ideal mic placement directly enhances audio capture by minimizing background noise and ensuring clear signals, making it a key step in setting levels during production. I always position the microphone close to the sound source—about 6 to 12 inches for vocals—to boost audio gain without introducing distortion. This lets me fine-tune gain settings on my recorder, keeping signals strong yet controlled. For instance, angling the mic slightly off-axis reduces plosives and echoes, allowing precise level adjustments. I’ve found that testing placement in the actual environment helps; I listen for balance and tweak as needed. Remember, best placement isn’t just about proximity—it’s about creating space for effective gain control, so your audio stays clean and professional during shoots. This approach has saved me from post-production headaches time and again.
Using Backup Microphones
To guarantee I capture flawless audio without interruptions, I always set up backup microphones during production. These provide a safety net if my primary mic fails or encounters issues like wind noise or clipping. I position them strategically, often as lavaliers or shotguns, to record from different angles, ensuring I maintain ideal levels even in dynamic scenes. For instance, if the main audio peaks unexpectedly, the backup lets me blend signals later, keeping everything under -6dB for headroom. This practice saves time and frustration, as I’ve avoided reshoots by having redundant sources ready. Remember, redundancy means I can monitor levels more accurately, adjusting gain on the fly to prevent distortion and achieve a balanced mix. It’s a simple step that elevates my final product every time.
Balancing Vocal and Background Music Levels
I’ve always prioritized vocals in my audio mixes to guarantee they’re clear and prominent, as they carry the main message in videos. That means I set vocal levels higher than background music to keep the focus on speech or narration. Once vocals are in place, I adjust background music levels to add depth without competing for attention.
Prioritizing Vocals
When mixing audio for videos, I always prioritize vocals to guarantee they cut through background music clearly, keeping dialogue at -12 dB to -15 dB while holding music to -18 dB to -22 dB for a balanced, distortion-free sound. This approach assures audio levels remain clear and engaging, making vocals the focal point without overwhelming the mix. I’ve found that proper audio levels enhance viewer retention by preventing fatigue from imbalanced sounds.
To illustrate, here’s a quick guide to managing audio levels effectively:
| Audio Element | Recommended dB Range | Key Benefit |
|---|---|---|
| Dialogue | -12 to -15 | Ensures clarity |
| Vocals | -12 to -15 | Maintains prominence |
| Background Music | -18 to -22 | Provides support |
| Overall Mix | -10 to -14 | Achieves harmony |
Adjusting Background Music
Balancing vocal and background music levels demands precision, so I keep music at -18 to -22 dB to support vocals without stealing the spotlight. When adjusting background music, I always prioritize its role as a subtle enhancer, ensuring it complements the narrative without overpowering dialogue. For instance, I use EQ tools to carve out space in the frequency spectrum, letting vocals shine while background music adds emotional depth. I’ve found that testing on various devices helps catch imbalances—lowering levels if music feels too prominent on headphones. Remember, background music should evoke mood without distraction; I aim for a seamless blend where viewers focus on the story, not the sound. This approach keeps your video professional and engaging, fostering that perfect audio harmony.
Techniques for Mixing and Post-Production
I always find that using compression and EQ is essential for smoothing out audio levels in my mixing process, as it helps control dynamics and enhance clarity. Next, managing stereo and mono tracks lets me create a balanced soundstage without overwhelming the mix. Let’s explore these techniques together to elevate your video audio.
Using Compression and EQ
One key technique in audio mixing involves using compression and EQ to refine your sound, ensuring that dynamic ranges stay controlled while frequencies are shaped for clarity. I often start with compression to tame those unpredictable peaks in dialogue or music, making sure quieter parts don’t get lost. For instance, I’ll set the threshold around -10dB and adjust the ratio to 4:1, which helps maintain even levels without squashing the life out of the audio. Then, I apply EQ to boost mid-range frequencies for better vocal clarity or cut muddy lows that clutter the mix. It’s amazing how these tools let me achieve a professional polish quickly. Remember, I always monitor changes in real-time to avoid over-processing, keeping your video’s audio engaging and balanced. In my experience, mastering compression enhances overall dynamics, making every element pop without distortion.
Managing Stereo and Mono Tracks
Effective management of stereo and mono tracks forms the backbone of a polished audio mix in post-production. In my audio mixing process, I start by identifying when to use stereo for immersive elements like music, panning sounds across channels to create depth without overwhelming the listener. This prevents clutter that mono conversion might cause. For mono tracks, I focus on dialogue and effects, ensuring they’re centered for compatibility on various devices. I actively balance levels, avoiding phase issues by checking mono compatibility—it’s a simple step that saves headaches. Remember, I always test mixes on headphones and speakers; this helps me catch imbalances early. By integrating stereo’s richness with mono’s reliability, I achieve a professional sound that engages viewers without distortion.
Ensuring Proper Export Levels
I always check the recommended export levels before finalizing my videos, aiming for peaks under -6dB and an overall mix between -10dB and -14dB to prevent distortion. This helps guarantee your audio plays back consistently across devices. I’ll also cover the role of bars and tones, which I use to calibrate and verify audio signals for professional results.
Recommended Export Levels
When exporting your video, it’s essential to follow specific audio levels to prevent distortion and guarantee playback consistency across platforms. I always recommend export levels that keep your overall audio mix between -10dB and -14dB, ensuring peaks don’t exceed -6dB to avoid clipping. For dialogue, I aim for -12dB to -15dB, while music sits at -18dB to -22dB, and sound effects range from -10dB to -20dB with occasional spikes to -8dB. These recommended export levels help maintain clarity and balance, so your content sounds professional on any device. I double-check these audio levels in my editing software before finalizing, as it prevents issues like muffled sound or overwhelming volume, enhancing viewer engagement without unnecessary adjustments.
The Role of Bars and Tones
Although many videos don’t require them, bars and tones serve as essential calibration tools that help me verify audio levels before export, ensuring playback consistency across devices. I always generate a tone at around -12dB to set a reference point, which lets me check if my audio levels align with industry standards. This practice prevents surprises, like distortion on different platforms. For instance, I use color bars for visual sync and a steady tone to measure peak levels, keeping everything under -6dB to avoid clipping. By incorporating bars and tones into my workflow, I actively maintain balanced audio levels, making exports sound professional and reliable. It’s a simple step that saves time and enhances quality, especially for cross-device compatibility.
Common Mistakes and How to Avoid Them
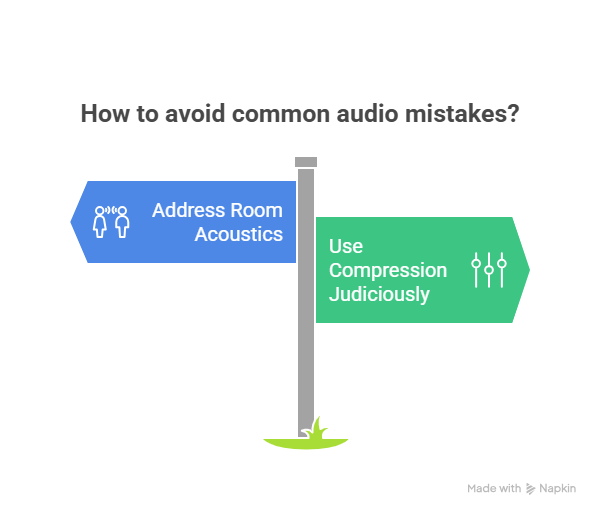
I’ve often made the mistake of ignoring room acoustics, which can throw off your audio levels and make everything sound muddy. Overcompressing audio is another pitfall I’ve encountered, as it flattens dynamics and kills the natural feel. Let’s explore how I sidestep these issues to get your levels just right.
Ignoring Room Acoustics
One common mistake in audio setup is ignoring room acoustics, which can distort your sound and undermine the final mix. I remember how room acoustics once threw off my entire project—echoes from hard surfaces amplified peaks and muddled dialogue, making precise leveling impossible. As a result, what sounded balanced in my studio fell flat on playback devices. To avoid this, I always assess the space first, checking for reflective walls or uneven sound distribution. I use simple tools like acoustic panels or move to a treated room, ensuring levels remain consistent. This way, I prevent unwanted reverberations from skewing my audio decisions. Remember, factoring in room acoustics lets me achieve clearer, more reliable results every time. Don’t overlook it—it’s the foundation of professional sound.
Overcompressing Audio
Overcompressing audio is a frequent pitfall that flattens dynamics and drains the life from your mix, as I’ve learned through trial and error. From my experience, it often happens when I aggressively tame audio peaks to even out levels, resulting in a dull, lifeless sound that loses viewer interest. This overzealous compression squashes the natural variation in peaks, making everything sound uniformly loud and robbing the audio of its emotional punch. To avoid this, I now use compression judiciously—setting a ratio of 4:1 or less and adjusting the threshold so peaks hit around -6dB without distortion. I monitor waveforms closely and A/B test mixes, ensuring dynamics remain intact for a professional feel. Remember, preserving those peaks keeps your video engaging and balanced, as I’ve discovered through practice.
When to Seek Professional Advice
I know that when you’re dealing with complex audio issues, like inconsistent levels or distortion, it’s time I recommend seeking professional advice. Professionals bring benefits such as expert mixing that refines your audio for a polished result. That way, you’ll identify and fix problems that I might not catch on my own.
Benefits of Professional Mixing
Professional mixing elevates your video’s audio quality by ensuring precise levels and seamless integration of elements like dialogue, music, and effects. As someone who’s tackled audio projects, I’ve found that professional mixing saves me countless hours of trial and error, delivering a polished sound that captivates audiences without distractions. It expertly balances elements, preventing issues like overpowering music or muffled dialogue, which I often struggle with on my own. When your video demands intricate layering or high-stakes delivery, seeking professional advice becomes invaluable—it’s when I turn to experts for that extra edge. They bring advanced techniques and tools, ensuring your content sounds professional across platforms, boosting viewer retention and overall impact. Ultimately, I believe investing in professional mixing elevates your work from good to exceptional, making it worth every penny.
Identifying Complex Audio Issues
Sometimes, audio issues like persistent distortion or uneven levels slip past my best efforts, signaling it’s time to bring in experts for a fresh perspective. As I tackle complex problems with audio levels, I watch for subtle signs like inconsistent peaks or background hums that disrupt balance. Recognizing these early prevents poor viewer experiences, so I assess if my adjustments fall short.
| Audio Issue | Symptoms (Audio Levels) | When to Seek Help |
|---|---|---|
| Distortion | Peaks exceeding 0dB | If self-fixing fails |
| Uneven Mixing | Fluctuations below -10dB | Persistent after testing |
| Background Noise | Levels dipping to -20dB | For professional equipment |
I always monitor audio levels closely; if they’re still off, professionals refine them quickly, ensuring polished results that keep audiences engaged. This approach saves time and elevates my videos’ quality.
Exploring Creative Audio Choices
I’ve always found that intentional distortion can transform a video’s mood, making it more raw and engaging. Sometimes, what seems like poor audio actually adds value by evoking emotions or realism that perfect levels might miss. In my experience, exploring these choices lets me push beyond standard settings for truly creative results.
Intentional Use of Distortion
While distortion is often viewed as a flaw in audio production, I deliberately use it as a creative technique to heighten emotional impact, such as in films like “Saving Private Ryan,” where muffled sounds immerse viewers in the chaos of battle. In my work, the intentional use of distortion adds texture and intensity, making scenes more visceral and engaging. For instance, I apply subtle distortion to sound effects or dialogue to evoke unease or excitement, ensuring it doesn’t clip by keeping peaks below -6dB. This approach transforms potential weaknesses into strengths, guiding audience emotions without overwhelming the mix. It’s about balance—I experiment with levels to enhance storytelling, creating a raw, authentic feel that draws viewers deeper into the narrative. By integrating distortion thoughtfully, I elevate audio beyond mere clarity, turning it into a powerful tool for expression.
When Poor Audio Adds Value
Although poor audio might seem detrimental, I often leverage it creatively to amplify emotional depth, as seen in scenes where muffled sounds immerse viewers in the story’s intensity. For instance, in films like “Saving Private Ryan,” poor audio mimics the chaos of battle, drawing audiences into the raw experience and heightening tension. I deliberately use poor audio to evoke unease or realism, such as distorted echoes in horror sequences, which make viewers feel vulnerable. This technique adds value by prioritizing emotional impact over clarity, transforming potential flaws into storytelling tools. By balancing poor audio with key elements like dialogue peaks, I guarantee it enhances rather than detracts from the narrative. Ultimately, embracing poor audio lets me craft more authentic, engaging videos that resonate deeply.
Frequently Asked Questions
What Software Is Best for Audio Editing?
I think the best software for audio editing is Adobe Audition—it’s my go-to because I find it powerful, user-friendly, and packed with features like noise reduction and multitrack editing for seamless results.
How Does Audio Affect Video SEO?
I see how audio affects video SEO—good audio keeps viewers engaged, boosting watch time and shares, which improves search rankings. Poor audio drives quick exits, increasing bounce rates and harming your video’s visibility. I’m always optimizing mine!
What’s the Difference Between Mono and Stereo?
I’m explaining the difference between mono and stereo: mono uses one channel, so all sounds blend into a single source, like old radios. Stereo employs two channels, creating a wider soundscape that positions audio left, right, and center for immersion.
Can I Use a Smartphone Mic for Videos?
I can use a smartphone mic for videos, but it’s not ideal for professional results. I’ll get decent sound if I position it close to the source and avoid noisy environments. For better quality, I test on different devices and adjust as needed. It’s a handy start, though!
How to Handle Audio Copyright Issues?
I find handling audio copyright issues essential, so I always check licenses first, use royalty-free music or get permissions, and credit creators properly. This way, I avoid lawsuits and keep my projects legal. Stay vigilant!
Conclusion
To sum up, I’ve shared my hard-earned insights to help you master audio levels and elevate your videos from amateur to professional. By keeping peaks under -6dB, normalizing between -10dB and -20dB, and balancing elements like dialogue and music, you’ll avoid pitfalls and create immersive content. Test on various devices, get creative, and apply these tips with confidence—I’m excited to see your audio shine!


